So I left the "blogosphere" for quite some time. Had a lot going on you know! My son has grown into full blown toddler stage, and my 10 month old daughter is now mobile. So I'm going to keep this short and sweet. On top of everything else I've got going on, managing South Beach Grill, putting together a new fall wine list (I'll talk about that next week), and working on plans for my own restaurant, I've been, as some of you know doing regular cooking classes here in Wilmington.
I've been keeping the recipes for the classes as simple as possible, but retaining a nice elegant feel to them.
On Tuesday, I did a class featuring a roasted butternut squash ravioli using wonton wrappers instead of going through the trouble and mess of making homemade pasta and rolling it out.
So like I said, short and sweet, here you are:
Roasted Butternut Squash Ravioli With Toasted Pine Nuts And Sage Butter
Butternut Squash, small 1
Extra Virgin Olive Oil ¼ cup plus 1 Tbs
Kosher Salt and Ground Black Pepper ½ Tbs
Yellow Onion, small, rough chopped 1
Garlic Cloves, large, rough chopped 2-3
White Wine (preferably Chardonnay) ¼ cup
Chicken Stock 1 cup
Grated Parmesan ½ cup
Toasted Pine Nuts ½ cup
Won-Ton Wrappers 40
Cornstarch as needed
Pre-heat oven to 350F.
Peel squash, and cut into 1 inch cubes. Place in a large mixing bowl, and toss with ¼ cup olive oil, Kosher salt and ground black pepper. Bake for about 1 hour to 1 ½ hours until squash has become soft, and just starts to brown.
While squash is baking, saute onions in remaining olive oil with the garlic until lightly browned. Deglaze with wine, and remove from heat. Let cool to room temperature.
Remove squash from oven, and let cool. Working in batches, blend squash in a food processor with onion/garlic mixture, chicken stock and Parmesan until well combined and smooth. Set aside.
In a small bowl, mix a little cornstarch with water to make a thin paste.
Lay won-ton wrappers on a lightly floured board, and place about ½ tablespoon of squash mix in the center of wrapper. Brush the edges of the wrapper with the cornstarch/water, and lay another wrapper on top. Make sure to press on all edges to remove any air pockets and get a good tight seal.
Bring a large pot of salted water to a boil. Working in small batches of 4 or 5, boil ravioli for about three minutes, and using a slotted spoon, remove from the water and place in a colander to drain.
For The Sauce:
Extra Virgin Olive Oil 3 Tbs
Butter 3 Tbs
Fresh Sage, minced 10 leaves
Heat olive oil and butter over medium low heat. When butter starts to lightly brown, and give off a slightly nutty aroma, add minced sage leaves. Immediately remove from heat, and let stand for two to three minutes to let flavor develop.
Arrange five ravioli on plates, pour sauce over top of each, and top with toasted pine nuts. Garnish if you like with grated Parmesan and chopped Italian parsley.
Serves Four

Thursday, October 20, 2011

Tuesday, July 19, 2011
Spiced Mahi Mahi With Carolina Peach Salsa
North Carolina Peaches are one of the best things about summer. For just a short time - from around the first of June, through most of August, North Carolina peaches are available.
The other night, I wanted to take advantage of this while also getting my two year old to try some different foods. He's just grown a bit too fond of "mac n cheese" and tater tots!
I also wanted to post this recipe for one Mrs. Brown who frequents the restaurant. Her son and his wife came in the other night, and he told me how highly she spoke of me and reads this blog. So thank you Mrs. Brown, and I hope you will try and enjoy this recipe as much as my family did!!
Spice Rubbed Mahi Mahi With Fresh Peach Salsa
Peach Salsa
Peaches, fresh (small to medium sized) 3 each
Red Onion, diced small ½ cup
Red Bell Pepper, diced small ½ cup
Cilantro, rough chopped 3 Tbs
Lime Zest 1 lime
Lime Juice ½ lime (reserve other half)
Sugar 1 tsp
Peel peaches (vegetable peeler works best for this) and dice small. Place in a mixing bowl and mix in all other ingredients. Keep chilled in refrigerator until ready to use.
Spice Rubbed Mahi Mahi
Mahi Mahi Filets, 5 – 6 oz 4
Caribbean Jerk Seasoning 1 Tbs
Sugar 1 Tbs
Olive Oil 2 Tbs
Lime Juice ½ lime
Orange Juice 2 Tbs
Pre heat oven to 350.
Mix jerk seasoning, sugar, olive oil, lime and orange juice in a bowl. Pour over Mahi Mahi filets, and let marinate in the refrigerator for 30 minutes. Bake for 25 to 30 minutes, until fish flakes easily with a fork. Plate, and spoon salsa over top of fish. Serve with fresh lime wedges.
Serves 4
The other night, I wanted to take advantage of this while also getting my two year old to try some different foods. He's just grown a bit too fond of "mac n cheese" and tater tots!
I also wanted to post this recipe for one Mrs. Brown who frequents the restaurant. Her son and his wife came in the other night, and he told me how highly she spoke of me and reads this blog. So thank you Mrs. Brown, and I hope you will try and enjoy this recipe as much as my family did!!
Spice Rubbed Mahi Mahi With Fresh Peach Salsa
Peach Salsa
Peaches, fresh (small to medium sized) 3 each
Red Onion, diced small ½ cup
Red Bell Pepper, diced small ½ cup
Cilantro, rough chopped 3 Tbs
Lime Zest 1 lime
Lime Juice ½ lime (reserve other half)
Sugar 1 tsp
Peel peaches (vegetable peeler works best for this) and dice small. Place in a mixing bowl and mix in all other ingredients. Keep chilled in refrigerator until ready to use.
Spice Rubbed Mahi Mahi
Mahi Mahi Filets, 5 – 6 oz 4
Caribbean Jerk Seasoning 1 Tbs
Sugar 1 Tbs
Olive Oil 2 Tbs
Lime Juice ½ lime
Orange Juice 2 Tbs
Pre heat oven to 350.
Mix jerk seasoning, sugar, olive oil, lime and orange juice in a bowl. Pour over Mahi Mahi filets, and let marinate in the refrigerator for 30 minutes. Bake for 25 to 30 minutes, until fish flakes easily with a fork. Plate, and spoon salsa over top of fish. Serve with fresh lime wedges.
Serves 4
Thursday, July 7, 2011
Panzanella Salad With Fresh Herbed Focaccia
So I've been away from the...what is it you people call it...oh, yeah the "blogosphere" for a little while. My son who is just over two ( Along with my wife, I detest those who actually continue to refer to their children's age in months. You know the ones----"yes, my son is 33 months old." Come on. Your son is two and a half. ) is transitioning from being just a cute little toddler to a cute little toddler that I have to chase after all of the time. Not to mention Grace, my daughter who is 7 months now, and becoming a little handful herself. So needless to say, I haven't had much time to do this, but anyway, here we go.
I had to cancel my last cooking class much to my disappointment. But for those out there interested, It was a great class concerning fresh summer recipes using herbs. I'm giving you this one for a Panzanella salad. You get the two for one deal here, because for the bread, I use homemade fococcia with fresh herbs.
I'm not going to go into too much history here on Panzanella, because you probably don't give much of a crap where it came from, just that you've heard of it, it's got a cool Italian name that kind of rolls off your toungue when you say it. But the long and short is that Panzanella is an Italian bread and tomato salad. Until the 20th century, the salad was based on onions and not tomatoes. It is made from stale bread, the tomatoes, and often other ingredients such as olives, capers, and fresh herbs.
Regardless, it's something different to put on the picnic table other than the same old crap you've been doing every year: e.g. green bean and potato salad. So here you go kids!
Panzanella With Herbed Focaccia
This simple, rustic Italian bread salad is a perfect summer starter. Any bread can be used as long as it’s left to get a little stale first. However, I think day-old home made focaccia with whatever herbs you like adds a nice touch.
For The Focaccia:
Active Dry Yeast 1 pkg
Warm Water (100F to 105F ) 1 1/3 cup
Granulated Sugar ¼ tsp
All Purpose Flour 3 ¾ cup
Fresh Herbs 4 Tbs (Oregano, Basil, Rosemary, even Mint work well)
Extra Virgin Olive Oil 6Tbs
Dried Basil 1 tsp
Dried Oregano 1 tsp
Kosher Salt 1 Tbs
Grated Parmesan Cheese ¼ cup plus 2 Tbs
Pre-heat oven to 350̊.
Combine yeast and sugar with the water, and let sit for about five minutes. The yeast will become slightly foamy when ready. Meanwhile, chop herbs and combine with the flour, salt and ¼ cup of the cheese. Add yeast mixture and four tablespoons of the olive oil to the flour, and mix gently to incorporate. Turn out onto a lightly floured surface, and kneed until smooth and elastic (about three or four minutes). Divide dough, and place in lightly oiled bowls, and cover with plastic wrap. Set in a warm place for about 1 ½ to 2 hours until dough has doubled in size.
When dough is finished rising, spray two 8 inch x 8 inch pans with pan-release spray, and place dough in pans, stretching to all four corners. Drizzle remaining olive oil over dough, along with the remaining Parmesan. Season dough liberally with Kosher salt, and bake for about 20 to 25 minutes.
Remove from oven and cool to room temperature.
For The Panzanella Salad:
Focaccia Bread, cut into 1 inch cubes about 1 pound
Cherry Tomatoes, halved 1 pound
Cucumber, sliced 1 cup
Red Onion, sliced ¾ cup
Extra Virgin Olive Oil ½ to ¾ cup
Red Wine Vinegar 3 Tbs
Fresh Basil Leaves, shredded 12 to 15 each
Place all ingredients in a large bowl, and stir to combine.
I had to cancel my last cooking class much to my disappointment. But for those out there interested, It was a great class concerning fresh summer recipes using herbs. I'm giving you this one for a Panzanella salad. You get the two for one deal here, because for the bread, I use homemade fococcia with fresh herbs.
I'm not going to go into too much history here on Panzanella, because you probably don't give much of a crap where it came from, just that you've heard of it, it's got a cool Italian name that kind of rolls off your toungue when you say it. But the long and short is that Panzanella is an Italian bread and tomato salad. Until the 20th century, the salad was based on onions and not tomatoes. It is made from stale bread, the tomatoes, and often other ingredients such as olives, capers, and fresh herbs.
Regardless, it's something different to put on the picnic table other than the same old crap you've been doing every year: e.g. green bean and potato salad. So here you go kids!
Panzanella With Herbed Focaccia
This simple, rustic Italian bread salad is a perfect summer starter. Any bread can be used as long as it’s left to get a little stale first. However, I think day-old home made focaccia with whatever herbs you like adds a nice touch.
For The Focaccia:
Active Dry Yeast 1 pkg
Warm Water (100F to 105F ) 1 1/3 cup
Granulated Sugar ¼ tsp
All Purpose Flour 3 ¾ cup
Fresh Herbs 4 Tbs (Oregano, Basil, Rosemary, even Mint work well)
Extra Virgin Olive Oil 6Tbs
Dried Basil 1 tsp
Dried Oregano 1 tsp
Kosher Salt 1 Tbs
Grated Parmesan Cheese ¼ cup plus 2 Tbs
Pre-heat oven to 350̊.
Combine yeast and sugar with the water, and let sit for about five minutes. The yeast will become slightly foamy when ready. Meanwhile, chop herbs and combine with the flour, salt and ¼ cup of the cheese. Add yeast mixture and four tablespoons of the olive oil to the flour, and mix gently to incorporate. Turn out onto a lightly floured surface, and kneed until smooth and elastic (about three or four minutes). Divide dough, and place in lightly oiled bowls, and cover with plastic wrap. Set in a warm place for about 1 ½ to 2 hours until dough has doubled in size.
When dough is finished rising, spray two 8 inch x 8 inch pans with pan-release spray, and place dough in pans, stretching to all four corners. Drizzle remaining olive oil over dough, along with the remaining Parmesan. Season dough liberally with Kosher salt, and bake for about 20 to 25 minutes.
Remove from oven and cool to room temperature.
For The Panzanella Salad:
Focaccia Bread, cut into 1 inch cubes about 1 pound
Cherry Tomatoes, halved 1 pound
Cucumber, sliced 1 cup
Red Onion, sliced ¾ cup
Extra Virgin Olive Oil ½ to ¾ cup
Red Wine Vinegar 3 Tbs
Fresh Basil Leaves, shredded 12 to 15 each
Place all ingredients in a large bowl, and stir to combine.
Saturday, May 21, 2011
Pancakes, Loved Ones, And The End Of The World!
So if one sixty fourth of your brain pays any attention to the news, I'm sure you heard about the nutcase pastor telling us that it was all going to be over yesterday. Well here I am today finishing this blog post.
But anyway, I just wanted to touch on my family breakfast yesterday. I made pancakes. Yeah, that's it. Pancakes. Better yet, they came from a box to which I added water. Tap water. That's right, tap water. Our organic water farmer from down the street was fresh out!
Part of my point is the simple joy of cooking for my family brings me. I don't care if it's some gourmet dinner with ingredients my wife and kids have never heard of or seen or if it's freaking pancakes from a cardboard box. The reaction is the same. The enjoyment and satisfaction of food. It's that simple. And that's why I cook. Food is love. Food brings people and families together.
Working in the restaurant business is a time consuming and demanding job. It takes a lot of time away from family. A price many of us who love what we do pay. My point is, my family keeps me grounded while working in a crazy business.
When I look in on my sleeping children after I come home, I'm reminded of what's most important. It makes me think.
Though the end of the world didn't come, the end could come at any time. And it could all be over in an instant. Crossing the street. Driving through a stoplight. Hell, perfectly healthy people have dropped dead for no apparent reason.
So if you have little ones, I hope you, like me never take them for granted. Cherish every precious moment. Try to remember every smile, laugh, giggle and cry. Love them unconditionally. Because the world may still be here tomorrow, but you might not be.
But anyway, I just wanted to touch on my family breakfast yesterday. I made pancakes. Yeah, that's it. Pancakes. Better yet, they came from a box to which I added water. Tap water. That's right, tap water. Our organic water farmer from down the street was fresh out!
Part of my point is the simple joy of cooking for my family brings me. I don't care if it's some gourmet dinner with ingredients my wife and kids have never heard of or seen or if it's freaking pancakes from a cardboard box. The reaction is the same. The enjoyment and satisfaction of food. It's that simple. And that's why I cook. Food is love. Food brings people and families together.
Working in the restaurant business is a time consuming and demanding job. It takes a lot of time away from family. A price many of us who love what we do pay. My point is, my family keeps me grounded while working in a crazy business.
When I look in on my sleeping children after I come home, I'm reminded of what's most important. It makes me think.
Though the end of the world didn't come, the end could come at any time. And it could all be over in an instant. Crossing the street. Driving through a stoplight. Hell, perfectly healthy people have dropped dead for no apparent reason.
So if you have little ones, I hope you, like me never take them for granted. Cherish every precious moment. Try to remember every smile, laugh, giggle and cry. Love them unconditionally. Because the world may still be here tomorrow, but you might not be.
Thursday, May 5, 2011
Tuesday, April 26, 2011
Spring, Summer, Roasted Ribs And New Wine
I haven't posted in a while, been busy with the kids, family life, and getting "Max's Sweet And Spicy Rub" up and running. In case you're wondering what the hell said rub is all about, let me offer a little shameless self-promotion:
While writing "Fresh Fish And Fried Pickles," I felt like I needed a good all-purpose spice rub thrown in the mix. So one day while I was comming up with just the right combination and balance of sweet and spicy, I looked down and noticed my beutiful baby boy, Max staring up at me and smiling ever so sweetly. And so at the same time that I found the perfect blend of sugars and spices to complete my rub recipe, what to name it instantly became a no-brainer.

No, I'm not going to give you the recipe. Visit the website, buy the book, and turn to page 64 for that! Or you can wait a few weeks, and I'll have the rub itself available for purchase.
Self promotion aside, here's where this all ties in. It's here. FINALLY, Spring with Summer just around the corner is HERE! With that in mind, I wanted to tell you about a great rib recipe I made last night, and the perfect wine to pair for the season.
So first, the ribs. I'll admit it. First of all, I can cook a lot of things, but I'm not the greatest when it comes to ribs. Pretty retarded huh? I know. Should be reletively simple, but for some reason, maybe it's a patients issue, my ribs, wheather done in the oven, or on the grill just come out a bit tough, and a lot less meaty than I would like.
I bought the ribs on sale (yeah, probably not the best way to start). They were a good four and a half pounds and yes, a little fatty with a lot of sinew that I had to remove. But I was determined to succeed this time, and because it was only 10:30 in the morning when I started to prep them, I was going to go the 'low and slow' route and I didn't care if I had to cook those puppies for 10 hours at 180 degrees.
After trimming up the ribs, and dividing them into 2 and 3 bone sections, I noticed on my kitchen shelf that I still had some Grand Marnier that I had used in a cooking class a couple of months ago. I also remembered the crock pot ribs my dad used to make using fresh oranges in the sauce. An idea flew into my head. Using the Grand Marnier and some neutral flavored rice wine vinegar, I had a really great flavoring for the rib roasting pan that they would in a sense "steam" in.
So in to the roasting pan we went, and in went the vinegar, a little water and a good bit of the orange flavored liqour. Now at this point, I'm thinking what the hell, I'll hit these guys with a little spice too. But being a little tired, and perhaps a little lazy at that moment, I used what ever was on my counter at the time and within reach: happened to be some generic cajun seasoning and a good bit of Max's Sweet And Spicy Rub. So I seasoned the ribs liberally on both sides, covered with foil, and into a 275 degree oven they went for four hours.
I'll tell you that I could have taken them out after three. The meat was already falling off the bone. But at this point I was quite pleased with myself, and figured if I screwed them up by cooking them more, they wouldn't suck any more than the last time I made ribs. So they got basted with some generic barbecue sauce (I said I was tired and a bit lazy that day, so give me a break!) and back in the oven uncovered at 325 degrees for the last hour. And after a full 5 hours of low and slow luxury, my ribs were not only fall of the bone, but they pretty much melted in your mouth!
Now just where does this all tie in with wine? Right here: Gruener Veltliner my friends! Hadn't tried it before, and really I prefer reds. But I swear this is muy new favorite wine!
For those of you not familiar with it (surprisingly a lot of people aren't), the Gruener Veltliner grape is grown primarily in Austria, and the resulting wine is one of the most food-friendly ones that you will find.
For those of you claiming to be wine snobs out there (and trust me, you are many), you would say that this wine has a bright crispness to it. Very light with a hint of mineral and a touch of citrus. Perhaps even a bit of green apple. The best way I can think of to describe the Gruener Veltliner would be to say it lies somewhere between a Pinot Grigio and a Sav. Blanc. However you want to describe it, it really is a food friendly wine. Traditionally one might pair with ribs a merlot, or pinot noir, but I tried the Gruener, and it was perfect.
If you are looking for a good Gruener, try Fred Loimer's "Lois." It's what we are pouring at South Beach Grill, and I'm thrilled at how many people we have turned on to it.
And remember: If you're planning on hosting a summer party this year, and want great food with no work on your part, I am now offering private chef/home catering services. You can check out a sample menu at www.fishnpickles.com
While writing "Fresh Fish And Fried Pickles," I felt like I needed a good all-purpose spice rub thrown in the mix. So one day while I was comming up with just the right combination and balance of sweet and spicy, I looked down and noticed my beutiful baby boy, Max staring up at me and smiling ever so sweetly. And so at the same time that I found the perfect blend of sugars and spices to complete my rub recipe, what to name it instantly became a no-brainer.

No, I'm not going to give you the recipe. Visit the website, buy the book, and turn to page 64 for that! Or you can wait a few weeks, and I'll have the rub itself available for purchase.
Self promotion aside, here's where this all ties in. It's here. FINALLY, Spring with Summer just around the corner is HERE! With that in mind, I wanted to tell you about a great rib recipe I made last night, and the perfect wine to pair for the season.
So first, the ribs. I'll admit it. First of all, I can cook a lot of things, but I'm not the greatest when it comes to ribs. Pretty retarded huh? I know. Should be reletively simple, but for some reason, maybe it's a patients issue, my ribs, wheather done in the oven, or on the grill just come out a bit tough, and a lot less meaty than I would like.
I bought the ribs on sale (yeah, probably not the best way to start). They were a good four and a half pounds and yes, a little fatty with a lot of sinew that I had to remove. But I was determined to succeed this time, and because it was only 10:30 in the morning when I started to prep them, I was going to go the 'low and slow' route and I didn't care if I had to cook those puppies for 10 hours at 180 degrees.
After trimming up the ribs, and dividing them into 2 and 3 bone sections, I noticed on my kitchen shelf that I still had some Grand Marnier that I had used in a cooking class a couple of months ago. I also remembered the crock pot ribs my dad used to make using fresh oranges in the sauce. An idea flew into my head. Using the Grand Marnier and some neutral flavored rice wine vinegar, I had a really great flavoring for the rib roasting pan that they would in a sense "steam" in.
So in to the roasting pan we went, and in went the vinegar, a little water and a good bit of the orange flavored liqour. Now at this point, I'm thinking what the hell, I'll hit these guys with a little spice too. But being a little tired, and perhaps a little lazy at that moment, I used what ever was on my counter at the time and within reach: happened to be some generic cajun seasoning and a good bit of Max's Sweet And Spicy Rub. So I seasoned the ribs liberally on both sides, covered with foil, and into a 275 degree oven they went for four hours.
I'll tell you that I could have taken them out after three. The meat was already falling off the bone. But at this point I was quite pleased with myself, and figured if I screwed them up by cooking them more, they wouldn't suck any more than the last time I made ribs. So they got basted with some generic barbecue sauce (I said I was tired and a bit lazy that day, so give me a break!) and back in the oven uncovered at 325 degrees for the last hour. And after a full 5 hours of low and slow luxury, my ribs were not only fall of the bone, but they pretty much melted in your mouth!
Now just where does this all tie in with wine? Right here: Gruener Veltliner my friends! Hadn't tried it before, and really I prefer reds. But I swear this is muy new favorite wine!
For those of you not familiar with it (surprisingly a lot of people aren't), the Gruener Veltliner grape is grown primarily in Austria, and the resulting wine is one of the most food-friendly ones that you will find.
For those of you claiming to be wine snobs out there (and trust me, you are many), you would say that this wine has a bright crispness to it. Very light with a hint of mineral and a touch of citrus. Perhaps even a bit of green apple. The best way I can think of to describe the Gruener Veltliner would be to say it lies somewhere between a Pinot Grigio and a Sav. Blanc. However you want to describe it, it really is a food friendly wine. Traditionally one might pair with ribs a merlot, or pinot noir, but I tried the Gruener, and it was perfect.
If you are looking for a good Gruener, try Fred Loimer's "Lois." It's what we are pouring at South Beach Grill, and I'm thrilled at how many people we have turned on to it.
And remember: If you're planning on hosting a summer party this year, and want great food with no work on your part, I am now offering private chef/home catering services. You can check out a sample menu at www.fishnpickles.com
Wednesday, March 9, 2011
Ginger Swordfish With Red Curry And Roasted Vegetable Orzo
It seems as though many chef/bloggers have a lot of time on their hands to take pretty pictures of their food and respective restaurants. And since my role at South Beach shifted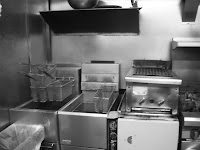 from Chef to General Manager, maybe that makes me a slacker. I sure as hell know that our Chef James doesn't have the time to do so. That being said, and the fact that I do have a bit more free time at the restaurant than he does, my next couple of posts will have some pics of my own.


 With spring finally here, and summer just around the bend, like most cooks, this is definitely my favorite time of the year. My radishes are already coming up, and this years herb garden is taking off as well.
 from Chef to General Manager, maybe that makes me a slacker. I sure as hell know that our Chef James doesn't have the time to do so. That being said, and the fact that I do have a bit more free time at the restaurant than he does, my next couple of posts will have some pics of my own.
 Enjoy!


 With spring finally here, and summer just around the bend, like most cooks, this is definitely my favorite time of the year. My radishes are already coming up, and this years herb garden is taking off as well.
In anticipation of all of the fabulous produce that comes around this time of year, I wanted to throw you a couple of my favorite recipes using the simple technique of roasted veggies.
Again, I'm going to jump on my soapbox and preach about how simplicity will always win the day, and that is the case in the recipe for Ginger Swordfish With Roasted Vegetable, Red Curry and Lobster Orzo.
Roasting vegetables only takes some good olive oil, salt and pepper, and of course, some nice fresh veggies. Roasting gives the vegetables a nice earthy, almost smoky flavor while helping to really bring out the natural sugars and give a wonderful flavor. Add them to pasta, salads, really whatever you like. In this recipe, the Swordfish becomes more like the accompaniment for what is actually a warm orzo salad with roasted vegetables and lobster meat. You can substitute cooked shrimp, crab, or other shellfish if you like. Red curry paste can be found in the Asian isle of most grocery stores.
This recipe will also be featured on an upcomming segment of "Carolina In The Morning" on WECT in just a few weeks, but until then here you go!
Swordfish Steaks, about 4-6 ounces each 4
Ground Ginger 2 Tbs
Granulated Sugar 1/4 cup
Zucchini, quartered 1
Yellow squash, quartered 1
Red bell pepper 1
Fennel bulb, chopped 1/2
Olive oil 4 Tbs
Cooked lobster meat 1/2 pound
Green chili pepper, sliced thin 1
Red curry paste 1 1/2 tsp
Lemon juice 2 Tbs
Orzo pasta 8 ounces (dry)
Pre-heat oven to 400.
Quarter zucchini and squash, then cut into 1/4 inch pieces. Cut fennel bulb in half, and remove the core, then chop along with the red pepper. Place vegetables in a large bowl, and drizzle about 1 tablespoon of olive oil over them, season lightly with Kosher salt and ground black pepper, and roast for about 25 minutes. Remove from oven and set aside.
Bring a large pot of salted water to a boil, and add orzo. Cook pasta for about 7 minutes until just cooked, but still slightly firm in the center. Drain pasta, and transfer to a large mixing bowl. To the drained pasta, stir in the remaining olive oil, and then the red curry paste. Fold in the roasted vegetables, lobster meat, and the chili pepper. Stir in the lemon juice and adjust the seasoning if needed. Set aside, but keep warm.
Heat a large non-stick skillet over medium high heat. Mix sugar and ground ginger in a small bowl, and coat each side of the swordfish steaks liberally. Cook for about 3 minutes on each side until the swordfish is cooked through. To plate, place a mound of the orzo mixture on each plate, and top with the fish. Garnish with lemon wedges.
Serves 4


Tuesday, March 1, 2011
Ladies And Gentlemen, I Give You....Cream Of Celery!
The other day I was cleaning out my fridge, and was left with just a few things, one of those being a couple of stalks of celery.
Not being one to waste food, I wondered what in the hell I'm going to do with all of that celery. Oh sure, I'd use some of it for mirepoix when I make rice, or maybe some other one-pot dish, but...wait...hold on here! Would I be jumping head-first into the dinosaur age if I did it?
Yes, Ladies and Gentlemen, straight from the archives of the 1950's culinary classics, I give you Cream Of Celery Soup!! I did however incorporate some nice roasted garlic cloves to give it a little bit of a punch along with some bell pepper. Next time we'll try it with roasted ginger. I do have to tell you, it turned out really nice, and with a garnish of some fresh cut chives, and even a little creme fraiche, it's still a simple classic, but elegant all the same.
I know. I really know-------Cream of celery soup???? Yes, it sounds boring, but like any other soup, just make it with a little love and a lot of passion, and you'll like the results!
Not being one to waste food, I wondered what in the hell I'm going to do with all of that celery. Oh sure, I'd use some of it for mirepoix when I make rice, or maybe some other one-pot dish, but...wait...hold on here! Would I be jumping head-first into the dinosaur age if I did it?
Yes, Ladies and Gentlemen, straight from the archives of the 1950's culinary classics, I give you Cream Of Celery Soup!! I did however incorporate some nice roasted garlic cloves to give it a little bit of a punch along with some bell pepper. Next time we'll try it with roasted ginger. I do have to tell you, it turned out really nice, and with a garnish of some fresh cut chives, and even a little creme fraiche, it's still a simple classic, but elegant all the same.
I know. I really know-------Cream of celery soup???? Yes, it sounds boring, but like any other soup, just make it with a little love and a lot of passion, and you'll like the results!
Vegetable Oil 2 Tbs
Garlic Cloves 8 to 10
Yellow Onions, diced 1/2 cup
Celery, diced 1/2 stalk (five to six ribs)
Green Bell Pepper, (or small Pablano) diced 1
Thyme 1/2 tsp
Butter 2 Tbs
Flour 2 Tbs
Chicken or Vegetable stock 2 cups
Whole Milk 2 cups
Old Bay Seasoning 1/8 tsp
Worcestershire 2 tsp
Salt and Pepper to taste
Heat vegetable oil in a large pot or sauce pan over medium heat. Add garlic cloves, and gently cook until they are browned all over. Increase heat to medium-high, and add onions, celery, and pepper and cook until softened, about three to four minutes. Add the butter and thyme, and stir well. When butter is melted, reduce heat to low, and stir in the flour, making sure to work out any lumps.
Cook for about seven minutes or so stirring often, then increase heat to medium high and add the stock. Bring to a simmer, and let cook over low heat for about 10 minutes. Add milk, Old Bay and Worcestershire, and let simmer for about five more minutes.
Remove soup from heat, and puree in a blender until smooth. If you have a hand held immersion blender, this would be the time to use it (one of my all-time favorite kitchen gadgets).
Season to taste with salt and pepper.
Thursday, February 10, 2011
A Sorry Excuse For A Chef, And A Bad Example To Aspiring Ones
The restaurant industry is certainly not an easy career choice, especially that of the Chef. The hours are very long, the work environment is hot, often cramped, and the constant bending and lifting certainly doesn't do positive things for your body.
All of these things being said, it's not hard to see why some Chefs may not have shall we say, the most warmhearted and chummy attitude. I think that it is something that often is overlooked by managers, owners and even customers because maybe the chef in question is such a damn good cook with a ridiculously creative menu. And I suppose that's o.k. But one thing all Chefs and cooks alike should remember is that no matter how annoying a customer may be, no matter how "needy" or hard-to-please they are, it is the customer, The Guest that pays the bills.
I recently read an article about a chef in Silver Spring Maryland, and what I read made me sick to my stomach. Apparently this "chef/owner" has such a chip on her shoulder that her and her staff made several Utube videos making fun of customers. The chef said in a later interview that they meant no harm, and were just passing time during the slow parts of the evening. Are you f*&#@k%ng kidding me????
As I read further, I discovered that this woman who calls herself a "chef" apparently enjoys making sure that everyone around her knows all of the hardships she has to face as a chef/owner of a "diner-esque" restaurant serving fried chicken and hushpuppies. She claims that her poor attitude is nothing personal, but just a "reflection of a overworked chef who must concentrate on ticket orders and not customer relations." Many of her customers have complained (or at least commented) on the fact that "Ms. Chef" doesn't interact with them in her restaurant(s). And her response to this was that the customer's gripes may be racially motivated (our "chef" in question is in fact African American). OH MY GOD!!!!! You see, she has an open kitchen in full view of the diners.
Let me tell you something: It does not matter if you are black, white, pink, purple, American, Hispanic or Martian! Your customers---your guests are the lifeblood of your business. No matter what, they should be treated with the utmost respect. If you are annoyed by some of them, then bitch about it to someone in your walk-in cooler. Don't post a silly Utube video. If you as the owner of your restaurant don't want to interact with your guests, then don't have an open kitchen!
If I walked in the kitchen at my restaurant and the Chef and his staff had enough time on their hands to be making videos, they would be fired!
Ms. Clark, is in a position she should be proud to be in. She is living the American Dream! And yet in an age where the status of the Chef has been elevated to super stardom, she disgracing us all.
In a time and economy in which restaurants are dropping like grains of sand in an hourglass, Ms. Clark needs to get the chip off of her shoulder, and be thankful she HAS customers.
All of these things being said, it's not hard to see why some Chefs may not have shall we say, the most warmhearted and chummy attitude. I think that it is something that often is overlooked by managers, owners and even customers because maybe the chef in question is such a damn good cook with a ridiculously creative menu. And I suppose that's o.k. But one thing all Chefs and cooks alike should remember is that no matter how annoying a customer may be, no matter how "needy" or hard-to-please they are, it is the customer, The Guest that pays the bills.
I recently read an article about a chef in Silver Spring Maryland, and what I read made me sick to my stomach. Apparently this "chef/owner" has such a chip on her shoulder that her and her staff made several Utube videos making fun of customers. The chef said in a later interview that they meant no harm, and were just passing time during the slow parts of the evening. Are you f*&#@k%ng kidding me????
As I read further, I discovered that this woman who calls herself a "chef" apparently enjoys making sure that everyone around her knows all of the hardships she has to face as a chef/owner of a "diner-esque" restaurant serving fried chicken and hushpuppies. She claims that her poor attitude is nothing personal, but just a "reflection of a overworked chef who must concentrate on ticket orders and not customer relations." Many of her customers have complained (or at least commented) on the fact that "Ms. Chef" doesn't interact with them in her restaurant(s). And her response to this was that the customer's gripes may be racially motivated (our "chef" in question is in fact African American). OH MY GOD!!!!! You see, she has an open kitchen in full view of the diners.
Let me tell you something: It does not matter if you are black, white, pink, purple, American, Hispanic or Martian! Your customers---your guests are the lifeblood of your business. No matter what, they should be treated with the utmost respect. If you are annoyed by some of them, then bitch about it to someone in your walk-in cooler. Don't post a silly Utube video. If you as the owner of your restaurant don't want to interact with your guests, then don't have an open kitchen!
If I walked in the kitchen at my restaurant and the Chef and his staff had enough time on their hands to be making videos, they would be fired!
Ms. Clark, is in a position she should be proud to be in. She is living the American Dream! And yet in an age where the status of the Chef has been elevated to super stardom, she disgracing us all.
In a time and economy in which restaurants are dropping like grains of sand in an hourglass, Ms. Clark needs to get the chip off of her shoulder, and be thankful she HAS customers.
Here is the link to the article http://www.washingtonpost.com/wp-dyn/content/article/2011/02/01/AR2011020103865.html
Saturday, January 29, 2011
Back In The Saddle With A Different View
This time of year at the restaurant, it's like playtime for me, because I get to spend a lot of time back in the kitchen. Like any business, our hourly staff gets some more time off, and us "salaried" types save the business a little money.

After having been the Chef for South Beach Grill for almost seven years it's not that I miss being in the kitchen. Oh sure, there are certain aspects of it that I will always miss a little bit, like expediting food orders on a busy Saturday night in the summer, much like a conductor leads an orchestra. Or the satisfaction of meticulously plating dozens of Grouper Linda's and Flounder Francaise dishes exactly the same and watching them go out to the tables knowing the guest is going to be blown away.
But what I love the most about my job as General Manager, is that I get a really good grip on every aspect of the food. As a Chef, it's easy to get "tunnel vision" when it comes to your food. You see your dishes in their preparation stage, through production, and final plating. But once that food goes up into the "window," you tend to forget about it because you have to move on to the next dish so quickly.
As GM, I also get to see those same dishes go to the tables, and I'm also able to get first-hand feed back from the customer on their experience. I think it's a unique privilege to be able to see all sides of things. What it really does is allow me to give valuable information to the Chef and kitchen staff when it comes to dishes working or not working. Even plate presentation is affected. In the kitchen, the lighting is very bright, and there is virtually no glare from the plates or food whatsoever. But when a plate hits the table, it's placed under a dim light, often next to a candle that can cause a slight glare off of a bright white plate. After all, no matter what food trends come and go, presentation goes a long way.
But I think the coolest thing about my job is that because I was in the kitchen for so long, I have the ability to answer most of the questions our guests have about the food, and I'm able to make suggestions for them.
I guess maybe I'm bragging or gloating a little bit here, but what I'm really trying to say is that I'm extremely lucky, and thankful for the job I have. I love every aspect of the restaurant business, and I'm fortunate enough to be elbow deep in all of it! I wouldn't trade my job for any other. I get to run a restaurant, and have my hands in both the front and back of the house. I get to throw my two cents into menu development, and my boss lets me have total control of the wine and beer lists.
But before I finish rambling on, I need to say that I couldn't have as much fun at my job, and be able to do it well if I didn't have the best staff that any restaurant manager could wish to have. The people who work for me and South Beach Grill show every day that they are there for so much more than themselves. They truely work to make the restaurant great. So my hat goes off to my staff, and I say thank you to all of them.
Monday, January 10, 2011
Trending Simple For 2011
Well, it's been quite some time since my last post, but with good reason. Along with my wife, I've been extremely busy. You see, on December 8, at 2:30 a.m. we were blessed with the arrival of our little girl, Grace Helen Kronenwetter. So much like with our son, Max just shy of two years ago, our lives have been turned upside down a bit. Her arrival was a nice way to end 2010.
 And so what will the new year bring us in the world of food? As a restaurant manager, I have been watching what trusted sources and industry "in-the-knows" have been predicting, and they're all pretty close together.
Among the most talked about trends are home canning and pickling, sustainability, and impact on the environment, and the continued rise of ethnic foods.
But my favorite trend that seemingly all analysts are talking about is something that I preach day in and day out: SIMPLICITY.
In an economy that is about as uncertain as it has ever been, diners are still reluctant to move away from the unfamiliar. I think the most successful restaurants of this year and even for a few years to come will be the ones serving straight-forward, no frills, no "look how freaking creative our chef is" food. Just take a look for example at a couple of the food magazines out there like bon appetit and Food and Wine. Only a couple of years ago you could pick any issue, and the picture on the cover would be something like squid ink pasta with steamed cockles, or some unrecognisable meat or poultry carefully made up to look more like a museum piece than something you would eat.
Look at recent issues by these same magazines, and you will see things like beautiful roasted chickens, and simply grilled thick pieces of fish.
That's not to say that chefs shouldn't be creative. After all, it's the creative passion for food that I hope we all got into this business for anyway. But I think that what is going to set chefs and restaurants apart in the upcoming year is not necessarily what innovative and new products they bring in their back door, but how creative they can be with the "common" foods diners are used to and more importantly how well they are prepared.
With all of that in mind, I'm excited to be presenting my next cooking class at "The Seasoned Gourmet" which will feature simple French Bistro fare. The evening's menu will include:
French Vegetable Soup
Mussels Sauteed In Wine, Garlic And Fresh Herbs
Curly Endive Salad With Champagne Vinaigrette
Pan Roasted Pork Medallions With Tarragon Mustard Sauce
Grand Marnier Chocolate Mousse
Sounds good, doesn't it. Once again, the focus will be how easy it can be to take simple preparations and making them into an elegant meal. Hope to see you there.
For more information go to: www.theseasonedgourmet.com
Thursday, December 2, 2010
Early Valentines Day!
So us "restaurant" types are always thinking ahead...WAY ahead. We have to. In order to stay up with not only competition, but also to anticipate things to come, we try to look as far into the culinary telescope that we can.
That being said, I'm looking not just to the next big holiday---New Year's Eve, but beyond that to Valentine's Day as well.
The other day I was flipping through some old Gourmet magazines looking for inspiration, and just passing the time, when I ran across a delicious looking recipe for a chocolate tart. I will tell you that I can do a lot of things in the kitchen, but will admit completely that baking is not my strong suit. Never has been. Well anyway, after I made this thing (with just a couple of my own alterations-----sorry, couldn't resist) it was so good I wanted to share the recipe with everyone. It's so rich and decadent, I think it would make a perfect Valentine's Day dessert.
Anyway, here you go:
Chocolate Almond Raspberry Tart (recipe adapted from Gourmet magazine)
Crust:
1 1/4 cups finely ground chocolate graham crackers
6 Tablespoons unsalted butter, melted
Filling:
6 ounces almond paste, crumbled
3 Tablespoons creamy peanut butter
3 Tablespoons brewed coffee
6 ounces bittersweet chocolate (don't exceed 61% cacao) chopped
1/2 cup heavy cream
1 pint fresh raspberries
2 Tablespoons seedless raspberry jam
1/4 cup Cabernet wine
1/2 cup sliced almonds, toasted
Preheat oven to 350F. Combine graham cracker crumbs and butter in a medium bowl. Stir until crumbs are evenly coated and beginning to stick together. Press crumb mixture in thin even layer onto the bottom and up the sides of a 9 inch spring-form pan. Bake crust until set and beginning to crisp, about 15 minutes. Cool crust completely.
Combine almond paste, peanut butter and coffee in a small bowl, and stir until it's become a smooth paste. Spread evenly over crust. Place the chocolate in a medium bowl, and bring cream to a simmer in a saucepan. Pour cream over chocolate, and stir to melt completely (did you know you just made a ganache?). Pour the mixture over the almond-peanut butter layer. Chill tart until chocolate is cold and let, at least 4 hours, and up to 1 day.
When tart is cooled and set. Slice raspberries in half lengthwise, and arrange around the tart. Stir jam and wine in a small pan over low heat until blended and heated through. Brush glaze over berries. Sprinkle almonds around the edge of the tart. Chill uncovered.
Using a small sharp knife, loosen crust from pan sides. Release the springform pan, cut into wedges and serve cold.
That being said, I'm looking not just to the next big holiday---New Year's Eve, but beyond that to Valentine's Day as well.
The other day I was flipping through some old Gourmet magazines looking for inspiration, and just passing the time, when I ran across a delicious looking recipe for a chocolate tart. I will tell you that I can do a lot of things in the kitchen, but will admit completely that baking is not my strong suit. Never has been. Well anyway, after I made this thing (with just a couple of my own alterations-----sorry, couldn't resist) it was so good I wanted to share the recipe with everyone. It's so rich and decadent, I think it would make a perfect Valentine's Day dessert.
Anyway, here you go:
Chocolate Almond Raspberry Tart (recipe adapted from Gourmet magazine)
Crust:
1 1/4 cups finely ground chocolate graham crackers
6 Tablespoons unsalted butter, melted
Filling:
6 ounces almond paste, crumbled
3 Tablespoons creamy peanut butter
3 Tablespoons brewed coffee
6 ounces bittersweet chocolate (don't exceed 61% cacao) chopped
1/2 cup heavy cream
1 pint fresh raspberries
2 Tablespoons seedless raspberry jam
1/4 cup Cabernet wine
1/2 cup sliced almonds, toasted
Preheat oven to 350F. Combine graham cracker crumbs and butter in a medium bowl. Stir until crumbs are evenly coated and beginning to stick together. Press crumb mixture in thin even layer onto the bottom and up the sides of a 9 inch spring-form pan. Bake crust until set and beginning to crisp, about 15 minutes. Cool crust completely.
Combine almond paste, peanut butter and coffee in a small bowl, and stir until it's become a smooth paste. Spread evenly over crust. Place the chocolate in a medium bowl, and bring cream to a simmer in a saucepan. Pour cream over chocolate, and stir to melt completely (did you know you just made a ganache?). Pour the mixture over the almond-peanut butter layer. Chill tart until chocolate is cold and let, at least 4 hours, and up to 1 day.
When tart is cooled and set. Slice raspberries in half lengthwise, and arrange around the tart. Stir jam and wine in a small pan over low heat until blended and heated through. Brush glaze over berries. Sprinkle almonds around the edge of the tart. Chill uncovered.
Using a small sharp knife, loosen crust from pan sides. Release the springform pan, cut into wedges and serve cold.
Don't forget, "Fresh Fish And Fried Pickles" makes a great holiday gift for the home cook in your family! Go to www.fishnpickles.com and order your signed copy!
Sunday, November 21, 2010
Holiday Scone Recipe
Thought I'd just throw you a good simple recipe for some holiday scones. When this time of year comes around, those of us who don't drink liquor somehow end up with a couple of half-full bottles of this or that lying around. After all, so many of those holiday cakes and other treats are just a bit better with a little nip of brandy, rum, or flavored liquor.
Last month for a cooking class, I needed to purchase some amaretto, so I've had this bottle sitting on my shelf. Well yesterday, I kind of ate all of the doughnuts I bought for my very pregnant wife. Not a wise thing to do considering all of the raging hormones going on.
To get myself a bit out of the doghouse so-to-speak, I wanted to make her something for breakfast other than the usual eggs, pancakes, etc. Scones are really easy, and the amaretto added a really nice touch. A great tip if you're only wanting a half dozen or so is to simply ball up half of the dough, wrap in plastic and refrigerate. It will keep for two to three days in the fridge, or up to two weeks in the freezer.
Preheat oven to 425F.
Whisk together in a large bowl:
2 cups all purpose flour
1/3 cup sugar
1 tablespoon baking powder
1/2 teaspoon salt
Drop in 6 Tablespoons of cold butter cut into pieces.
Cut the butter with a fork or pastry blender, and work into the flour mixture until the whole mix resembles bread crumbs, and the butter pieces are about the size of peas. Don't let the butter melt.
Stir in 3/4 cup of raisins or dried cranberries.
Whisk together in a small bowl, then add to the flour mixture:
1 large egg
1/4 cup heavy cream
1/4 cup amaretto
2 teaspoons ground cinnamon
Using a rubber spatula or spoon, mix the dough until it starts to come together, then using your hands, form into a ball in the bowl, being sure to get all of the mix encorporated.
Turn out onto a lightly floured surface, and pat the dough into a 8 inch round about 3/4 inch thick. Cut into wedges, and place on a baking sheet keeping them about 1/2 inch apart. Bake for about 12 to 15 minutes just until the tops are brown.
Last month for a cooking class, I needed to purchase some amaretto, so I've had this bottle sitting on my shelf. Well yesterday, I kind of ate all of the doughnuts I bought for my very pregnant wife. Not a wise thing to do considering all of the raging hormones going on.
To get myself a bit out of the doghouse so-to-speak, I wanted to make her something for breakfast other than the usual eggs, pancakes, etc. Scones are really easy, and the amaretto added a really nice touch. A great tip if you're only wanting a half dozen or so is to simply ball up half of the dough, wrap in plastic and refrigerate. It will keep for two to three days in the fridge, or up to two weeks in the freezer.
Preheat oven to 425F.
Whisk together in a large bowl:
2 cups all purpose flour
1/3 cup sugar
1 tablespoon baking powder
1/2 teaspoon salt
Drop in 6 Tablespoons of cold butter cut into pieces.
Cut the butter with a fork or pastry blender, and work into the flour mixture until the whole mix resembles bread crumbs, and the butter pieces are about the size of peas. Don't let the butter melt.
Stir in 3/4 cup of raisins or dried cranberries.
Whisk together in a small bowl, then add to the flour mixture:
1 large egg
1/4 cup heavy cream
1/4 cup amaretto
2 teaspoons ground cinnamon
Using a rubber spatula or spoon, mix the dough until it starts to come together, then using your hands, form into a ball in the bowl, being sure to get all of the mix encorporated.
Turn out onto a lightly floured surface, and pat the dough into a 8 inch round about 3/4 inch thick. Cut into wedges, and place on a baking sheet keeping them about 1/2 inch apart. Bake for about 12 to 15 minutes just until the tops are brown.
Friday, August 13, 2010
The Southern Melting Pot
I have been cooking for a long time. I have had the fortune to cook in some very nice restaurants, and with some very talented chefs. So one might assume, that through my twenty-some years of cooking I would have developed a definitive style, right? Well I was asked the other day to describe just what my style of cooking is, and I have to say I was stuck! It has actually caused a few sleepless nights just trying to answer that question. What I have come up with is that there is no answer. My style of cooking is eclectic, and influenced by all cuisines, as well as the people around me. I think that's why living and cooking in the south suits me just fine.
The Southern United States really is a melting pot of cuisines. Here in North Carolina, we have influences from the Native Americans who introduced corn and other vegetables. In the 1500's, Spanish explorers brought pigs with them introducing pork. In the 1600's, West Africans carried some of their traditional food with them such as eggplant, collard greens and okra when they were forced here as slaves.
Perhaps it is my classical French training, or maybe just my love for hot sauce and craw fish that makes the cuisine of Southern Louisiana my favorite of all. Both Creole and Cajun styles of cooking reflect heavy French influences, and bring a passion for cooking from the heart like no other. Creole and Cajun cooking do have their differences. Creole cooking is a bit more refined, with heavy influences from the French, Germans, Africa and the West Indies. Cajun cooking is more spiced, with more "one-pot" dishes heavily influenced by Native Americans.
What the do share, is what all southern cooking encompasses: A love and passion for food and cooking that you will find in no other culture. And why shouldn't they. It is the food of the Southern United States that is a melting pot of European cuisine.

The Southern United States really is a melting pot of cuisines. Here in North Carolina, we have influences from the Native Americans who introduced corn and other vegetables. In the 1500's, Spanish explorers brought pigs with them introducing pork. In the 1600's, West Africans carried some of their traditional food with them such as eggplant, collard greens and okra when they were forced here as slaves.
Perhaps it is my classical French training, or maybe just my love for hot sauce and craw fish that makes the cuisine of Southern Louisiana my favorite of all. Both Creole and Cajun styles of cooking reflect heavy French influences, and bring a passion for cooking from the heart like no other. Creole and Cajun cooking do have their differences. Creole cooking is a bit more refined, with heavy influences from the French, Germans, Africa and the West Indies. Cajun cooking is more spiced, with more "one-pot" dishes heavily influenced by Native Americans.
What the do share, is what all southern cooking encompasses: A love and passion for food and cooking that you will find in no other culture. And why shouldn't they. It is the food of the Southern United States that is a melting pot of European cuisine.
Here is a recipe for a Caribbean Black Bean Soup With Smoked Sausage. It serves as an example of a delicious soup that carries influences from Spain, and the Mediterranean, while utilizing one of the South's prominent staples: Pork! And don't forget to check out other great recipes in "Fresh Fish And Fried Pickles." Go to www.fishnpickles.com and get your signed copy!
"JOUIR!"
Caribbean Black Bean Soup With Smoked Sausage
1/3 cup olive oil
2 Tbs garlic, chopped
2 cups yellow onions, chopped
1/2 cup celery, chopped
1/2 cup carrot, chopped
3 serrano peppers, sliced thin
2 ham hocks
1/2 tsp ground black pepper
1 tsp ground cumin
1 Tbs chili powder
1 Tbs jerk seasoning
3 15.25 oz cans black beans
1 3/4 cups chicken stock
1/2 pound smoked sausage, sliced
In a large stock pot, heat the olive oil on medium-high heat, add garlic and saute until it just begins to turn white. Add carrots, onion and celery, and saute for about five minutes until vegetables begin to soften. Stir in all seasonings, reduce heat to medium and add ham hocks.
Add chicken stock and black beans, increase heat to high, and bring to a simmer. Reduce heat to low, and continue to cook for about one hour until soup thickens slightly. Stir in smoked sausage, and serve.
Makes about six servings.
Monday, July 26, 2010
Wedge Salad With Creamy Feta Dressing

It was another busy week-end at South Beach Grill, and once again, the kitchen put out some fantastic dishes. You know I always talk about how so often simple is best. Well here is a recipe for an Iceburg Wedge Salad that a very nice guest asked me about. You will find this recipe in the book "Fresh Fish And Fried Pickles" as well as soon as it's in print (should be only a couple more weeks!). A nice preview of the book can be found at its website: http://www.fishnpickles.com/
In the mean time, here's that delicious wedge salad!
4 Roma tomatoes
1/2 tsp Kosher salt
1/2 Tbs. dried oregano
1 tsp olive oil
1/2 tsp black pepper
4 leaves leaf lettuce
1 head iceburg lettuce
1 cup sliced red onion
1/2 cup cooked chopped bacon
For The Dressing:
1 cup half and half
1/4 cup lemon juice
1/2 Tbs black pepper
2 Tbs Italian parsley, chopped
1 cup mayonnaise
2 cups crumbled feta cheese
2 Tbs minced chives
Combine all dressing ingredients, and mix well.
Pre-heat oven to 400F. Quarter the tomatoes, and place on a baking sheet. Drizzle the tomatoes with olive oil, and season with salt, pepper, and oregano. Bake for about 10 minutes, just until the skin of the tomatoes starts to soften.
Cut the iceburg head into 4 equal sections. Arrange one piece of leaf lettuce on each serving plate, and set wedge on top. Top with red onions, and ladel dressing evenly over each salad. Garnish with chopped bacon, and roasted tomatoes.
Thursday, July 8, 2010
"SIMPLY" Delicious! Back To The Basics
Last night a couple came into the restaurant for dinner. After they had somewhat worked their way into the meal, I approached the table, and asked them if they were enjoying dinner. The gentleman said that his Grouper "Linda" (pecan-crusted grouper with a lump crab and sherry beurre blanc) was very good, and his wife's meal was excellent as well. But what he most noted as being perfectly done was the sauteed vegetables that accompanied his dish. In fact, his comment to me was that he and his wife had not had vegetables that perfectly cooked and seasoned since their honeymoon in Venice, Italy!
Sooooooo what, you say? Well, it just shows like it has countless other times, that if great care is taken in the simple things, great tasting and eye-appealing food is really easy. When we cook, we pay attention to what we are doing. We understand the concept of how the heat of the pan is causing the food in it to react.
I keep saying it over and over, but to cook great food requires just a few basic ingredients and practices. Lets take our sauteed vegetables for example.
Start with FRESH ingredients, and a really HOT pan
Extra virgin olive oil
A little Kosher salt
Fresh ground pepper
Splash of white wine
From there we take some julienned squash, zucchini, red bell pepper and onions, and sautee them for just a few seconds in olive oil. Then just a splash of wine (the wine helps to somewhat steam the vegetables), season lightly with salt and pepper, and away we go! No magic here, just some high heat, and care for what we're doing.
The same principle applies to fish. I am a firm believer in the fresher the fish, the less you need to mess with it.
When we get grouper in for example, and it looks absolutely beautiful, glossy, and smells like nothing but the sea, the first thing that comes to mind is: Grill. Olive Oil, Lemon. No need to mask the thing with a heavy sauce, or even a light butter sauce. I've got a good example of this very dish in the book, "Fresh Fish And Fried Pickles" comming out in early August. It's Grilled Grouper With Roasted Tomatoes, Olives And Feta.
You can check out the photo of it and a couple of really simple recipes at: www.fishnpickles.com
Sooooooo what, you say? Well, it just shows like it has countless other times, that if great care is taken in the simple things, great tasting and eye-appealing food is really easy. When we cook, we pay attention to what we are doing. We understand the concept of how the heat of the pan is causing the food in it to react.
I keep saying it over and over, but to cook great food requires just a few basic ingredients and practices. Lets take our sauteed vegetables for example.
Start with FRESH ingredients, and a really HOT pan
Extra virgin olive oil
A little Kosher salt
Fresh ground pepper
Splash of white wine
From there we take some julienned squash, zucchini, red bell pepper and onions, and sautee them for just a few seconds in olive oil. Then just a splash of wine (the wine helps to somewhat steam the vegetables), season lightly with salt and pepper, and away we go! No magic here, just some high heat, and care for what we're doing.
The same principle applies to fish. I am a firm believer in the fresher the fish, the less you need to mess with it.
When we get grouper in for example, and it looks absolutely beautiful, glossy, and smells like nothing but the sea, the first thing that comes to mind is: Grill. Olive Oil, Lemon. No need to mask the thing with a heavy sauce, or even a light butter sauce. I've got a good example of this very dish in the book, "Fresh Fish And Fried Pickles" comming out in early August. It's Grilled Grouper With Roasted Tomatoes, Olives And Feta.
You can check out the photo of it and a couple of really simple recipes at: www.fishnpickles.com
Thursday, June 24, 2010
So I See You Went To Culinary School...
When my son Max reaches the age of deciding what he wants to do with his life (thank God that's not for about 18 years!), if he wants to be a chef, well that's great, and off to culinary school he will go. But hopefully he will have learned from his dad, and from his dad's peers that culinary school alone will not give him all the skills he will need to become a great chef, or even restaurant cook for that matter. I bring this up because of my observations of the culinary work force over the last few years, at least in the Wilmington NC area.
Thanks to the Food Network, Bravo, and other channels that host an array of celebrity and non-celebrity cooking shows, the status of the "chef" has been elevated to that of a sort of "rock star" like persona. But of course everyone knows this, and this has all been said before.
But something that I think this has also affected is the frame of mind and work ethic of young people fresh out of culinary school. I think a lot of young culinary students figure that because they are a Johnson and Wales grad, or even CIA grad, they have what it takes to make it in real professional and very busy kitchens. I can assure you that this is not the case.
To be honest, and I mean no offense, but I have hired and worked with young men and women alike who boasted a degree from an acclaimed school, but couldn't cook there way out of a revolving glass door! Yes it's true that the celebrities on food network make everything look really easy. And in fact, the things they are doing are quite easy. But they have people. There ingredients are for the most part, already prepped for them.
What young kids may not realize, is that to get to that point, most (not all, but most) of the tv/chef personalities actually paid their dues in real kitchens. Emeril Lagasse started working in a local bakery as a small boy. He worked in restaurants to pay his tuition. He spent years working in fine dining kitchens after attending Johnson and Wales culinary school. In 1982, he took the Executive Chef position at the Commander's Palace in New Orleans, and put in 18 hour days regularly.
The food network "rock star" Guy Fiere managed, and worked in restaurant kitchens for years before he was able to open his own place.
And the list goes on. But what all these guys have in common is that they worked hard, and didn't expect that things get handed to them because they went to culinary school.
Cooking in professional kitchens is a demanding job. Very demanding. And on top of the physical demands, to be successful, you have to have common sense (I like to call it "kitchen sense"). You have to be quick. You have to work clean and work efficiently. You have to be prepared for what may come next.
And here I go again with this word: Passion. You have to be passionate about what you do. If you are not passionate, then you do not care enough, and it will show in your work, or lack of work.
These are the things that I remember seeing more of 10 years ago. Lately it's a lot of people who can interview well, but when it comes to producing, they are falling short. This may sound cliche, but I do blame the parents a little bit. My father's constant words to me were: "Don't half-ass the job!" I appreciate the few things that I have, because I worked very hard for them. And when I was offered my first chef job, I knew the backbreaking and mentally stressful schedule that came with it. Things haven't changed. The title of chef or even sous chef should not be taken lightly. Whether it is at a four star hotel, or a little restaurant on the beach, the chef's job is one that requires a lot of responsibility, and work.
So if you've been to culinary school, and maybe even worked in a couple of popular and busy restuarants, If you want to work at my restaurant, I will say this:
So I see you went to culinary school...now how will you convince me you are actually a good cook?

Thanks to the Food Network, Bravo, and other channels that host an array of celebrity and non-celebrity cooking shows, the status of the "chef" has been elevated to that of a sort of "rock star" like persona. But of course everyone knows this, and this has all been said before.
But something that I think this has also affected is the frame of mind and work ethic of young people fresh out of culinary school. I think a lot of young culinary students figure that because they are a Johnson and Wales grad, or even CIA grad, they have what it takes to make it in real professional and very busy kitchens. I can assure you that this is not the case.
To be honest, and I mean no offense, but I have hired and worked with young men and women alike who boasted a degree from an acclaimed school, but couldn't cook there way out of a revolving glass door! Yes it's true that the celebrities on food network make everything look really easy. And in fact, the things they are doing are quite easy. But they have people. There ingredients are for the most part, already prepped for them.
What young kids may not realize, is that to get to that point, most (not all, but most) of the tv/chef personalities actually paid their dues in real kitchens. Emeril Lagasse started working in a local bakery as a small boy. He worked in restaurants to pay his tuition. He spent years working in fine dining kitchens after attending Johnson and Wales culinary school. In 1982, he took the Executive Chef position at the Commander's Palace in New Orleans, and put in 18 hour days regularly.
The food network "rock star" Guy Fiere managed, and worked in restaurant kitchens for years before he was able to open his own place.
And the list goes on. But what all these guys have in common is that they worked hard, and didn't expect that things get handed to them because they went to culinary school.
Cooking in professional kitchens is a demanding job. Very demanding. And on top of the physical demands, to be successful, you have to have common sense (I like to call it "kitchen sense"). You have to be quick. You have to work clean and work efficiently. You have to be prepared for what may come next.
And here I go again with this word: Passion. You have to be passionate about what you do. If you are not passionate, then you do not care enough, and it will show in your work, or lack of work.
These are the things that I remember seeing more of 10 years ago. Lately it's a lot of people who can interview well, but when it comes to producing, they are falling short. This may sound cliche, but I do blame the parents a little bit. My father's constant words to me were: "Don't half-ass the job!" I appreciate the few things that I have, because I worked very hard for them. And when I was offered my first chef job, I knew the backbreaking and mentally stressful schedule that came with it. Things haven't changed. The title of chef or even sous chef should not be taken lightly. Whether it is at a four star hotel, or a little restaurant on the beach, the chef's job is one that requires a lot of responsibility, and work.
So if you've been to culinary school, and maybe even worked in a couple of popular and busy restuarants, If you want to work at my restaurant, I will say this:
So I see you went to culinary school...now how will you convince me you are actually a good cook?
Wednesday, June 9, 2010
A Chowder For All Seasons
Recently, South Beach Grill was honored with the award of "Best Hot Soup" in the Voter's Choice Awards at the Taste of Wilmington (see article at www.starnewsonline/tasteofwilmington).
Our Clam Chowder is one of those recipes that has remained unchanged since it first appeared on the menu, and for good reason: it's delicious. That's it. It's not thick and heavy like some, but it has just enough weight to it that to make a great appetizer in the summertime, or a full meal when the weather gets cool. Like any good chowder, time and care are given to build the soup in layers, with attention to detail being paid with each one.
I think there's just something emotional about sitting out on the South Beach patio, looking out at the boats on Bank's Channel, and enjoying a nice hot cup of homemade clam chowder.
Probably more than any other dish on the menu, we are asked how the chowder is made, and for the nice couple I spoke with last night (as they watched the boats on Banks Channel), here you are:
Butter 3 tbs.
Bacon 1 cup (about 4 or 5 slices), chopped fine
Celery, diced 1 cup
Onion, diced 1/2 cup
Carrot, diced 1/2 cup
Thyme, 1 tsp
Garlic, minced 1 tbs.
All purpose flour 1/3 cup
Clam juice 8 oz
Water 1/2 cup
Red potatoes, quartered and sliced thin 1/2 pound
Milk 1 1/4 cup
Canned chopped clams 2-6.5 oz cans
Worcestershire sauce 2 tsp
Tabasco sauce 2 tsp
In a 8-quart stock pot, heat butter on medium high heat. When melted, add bacon and cook until it just begins to crisp. Add garlic and vegetables, and cook until they soften slightly, about two to three minutes. Stir in thyme, and reduce heat to low. Using a wooden spoon, gradually stir in flour until all is thoroughly incorporated.
At this point, you will want to change your utensil to a whisk, and slowly whisk in the clam juice making sure to get out all of the lumps of flour. Add water and potatoes, and bring soup to a simmer. Continue to simmer until potatoes are tender, about 10 minutes, stirring occasionally.
Add clams, milk, Worcestershire and TAbasco. Continue to simmer soup for about 20 minutes. Season to taste with Kosher salt and ground black pepper.
Makes about 6 to 8 servings
Our Clam Chowder is one of those recipes that has remained unchanged since it first appeared on the menu, and for good reason: it's delicious. That's it. It's not thick and heavy like some, but it has just enough weight to it that to make a great appetizer in the summertime, or a full meal when the weather gets cool. Like any good chowder, time and care are given to build the soup in layers, with attention to detail being paid with each one.
I think there's just something emotional about sitting out on the South Beach patio, looking out at the boats on Bank's Channel, and enjoying a nice hot cup of homemade clam chowder.
Probably more than any other dish on the menu, we are asked how the chowder is made, and for the nice couple I spoke with last night (as they watched the boats on Banks Channel), here you are:
Butter 3 tbs.
Bacon 1 cup (about 4 or 5 slices), chopped fine
Celery, diced 1 cup
Onion, diced 1/2 cup
Carrot, diced 1/2 cup
Thyme, 1 tsp
Garlic, minced 1 tbs.
All purpose flour 1/3 cup
Clam juice 8 oz
Water 1/2 cup
Red potatoes, quartered and sliced thin 1/2 pound
Milk 1 1/4 cup
Canned chopped clams 2-6.5 oz cans
Worcestershire sauce 2 tsp
Tabasco sauce 2 tsp
In a 8-quart stock pot, heat butter on medium high heat. When melted, add bacon and cook until it just begins to crisp. Add garlic and vegetables, and cook until they soften slightly, about two to three minutes. Stir in thyme, and reduce heat to low. Using a wooden spoon, gradually stir in flour until all is thoroughly incorporated.
At this point, you will want to change your utensil to a whisk, and slowly whisk in the clam juice making sure to get out all of the lumps of flour. Add water and potatoes, and bring soup to a simmer. Continue to simmer until potatoes are tender, about 10 minutes, stirring occasionally.
Add clams, milk, Worcestershire and TAbasco. Continue to simmer soup for about 20 minutes. Season to taste with Kosher salt and ground black pepper.
Makes about 6 to 8 servings
Tuesday, June 8, 2010
SIMPLE Summer Grilling
While I am a chef and restaurant manager by trade, at the core of it all, I just love food and cooking, pure and simple. It is a passion that drives me insane at times. And there is no season that ignites and inspires my passion for grilled food like summer.
I've been seeing a lot of great recipes for summer grilling, tried a few, and liked most of them, but I found (as I figured I would), that the simplest recipes were the ones that were best. It's no secret, and I say it all the time: Use the freshest ingredients you can find, prepare them simply keeping their integrity, and you'll have a great tasting meal!
What do I mean when I say keep the "integrity" of the food? Say for example I go to my local seafood market, and the boats just brought in some grouper. It's so fresh it has no oder at all except for the faint smell of the sea. There's no better way to prepare it then simply rubbing it with some good olive oil, a dash of Kosher salt and cracked black pepper, gently grilling it to perfection, and finishing it with a bright splash of fresh lemon juice. No need to mask it with a sauce.
Here's another one I tried a couple of days ago. A really nice couple came into the restaurant and were commenting on the great meal they had. The gentleman was telling me about a salmon recipe he had with brandied peaches. Sounded wonderful, so I took that idea, and brought it home to my grill. Again, you really have to go, "O.K. Summer: fresh, bright, crisp and clean flavors." The peaches got quartered, drizzled with a little oil, and grilled for just a few minutes. The salmon I grilled as well, and made a really nice barbecue sauce with a little added chipotle pepper, peaches, and the brandy. I always strive to have a good balance of flavors, and the heat of the chipotle barbecue sauce worked really well with the fresh, sweet peaches.
Vegetables too. Zucchini and yellow squash may sound redundant and like something straight out of the eightie's, but damn if it's not tasty grilled and drizzled with some extra virgin olive oil!
We've been doing sautee'd julienned squash and zucchini at South Beach Grill for years, and still get compliments from our guests on how good our vegetables are, and asked what we do to them. Well my friends, it's not hard, we use fresh veggies, and saute them to order just till there cooked through, and finish them with olive oil. That's it! No butter, no excess seasoning, just a nice quick saute in a really hot pan.
As tempting as it is, especially for us guys, not everything needs to be grilled. Roasting in the oven is a great way to bring out the flavor of vegetables and some fruits as well. At the restaurant, we serve an Iceburg wedge salad with oven roasted Roma tomatoes. The salad is served with a peppery feta dressing, and roasting the tomatoes brings out their sweetness which is a nice balance (there's that word "balance" again) and contrast to the dressing.
Summer is here. And with it comes a bounty of wonderful produce. So wheather you're grilling some fresh picked rhubarb, or roasting tomatoes, remember to keep things simple, and let the freshness of the product your using be your guide.
Grilled Salmon and Peaches With Chipotle Peach Barbecue Sauce
4 each salmon filets
2 each fresh peaches
2 tbs. extra virgin olive oil
1/2 yellow onion, diced small
1-15.25 oz can peach halves in syrup
3 each chipotle peppers (packed in adobo sauce)
2 tbs. sugar
1/4 cup apple cider vinegar
1/4 cup brandy
2 tbs. molasses
Pre-heat a gas or charcoal grill.
Slice fresh peaches in half, and remove the pit. Cut into quarters. Brush the salmon filets with 1 1/2 tablespoons of the olive oil, and season lightly with Kosher salt and ground black pepper.
While grill is heating, make the sauce. In a medium saucepan, saute the onions in 1/2 tablespoon of olive oil. When onions have softened, add sugar, brandy, vinegar, and molasses. Bring sauce to a simmer for about 10 minutes. Remove from heat, transfer sauce to a blender, and add the canned peaches and chipotle peppers. Blend until smooth.
Brush grill with vegetable oil, and grill salmon to desired doneness, basting with the barbecue sauce just before removing. Grill peach quarters for about two minutes per side.
Plate the salmon, top with the peaches, and serve remaining barbecue sauce on the side.
I've been seeing a lot of great recipes for summer grilling, tried a few, and liked most of them, but I found (as I figured I would), that the simplest recipes were the ones that were best. It's no secret, and I say it all the time: Use the freshest ingredients you can find, prepare them simply keeping their integrity, and you'll have a great tasting meal!
What do I mean when I say keep the "integrity" of the food? Say for example I go to my local seafood market, and the boats just brought in some grouper. It's so fresh it has no oder at all except for the faint smell of the sea. There's no better way to prepare it then simply rubbing it with some good olive oil, a dash of Kosher salt and cracked black pepper, gently grilling it to perfection, and finishing it with a bright splash of fresh lemon juice. No need to mask it with a sauce.
Here's another one I tried a couple of days ago. A really nice couple came into the restaurant and were commenting on the great meal they had. The gentleman was telling me about a salmon recipe he had with brandied peaches. Sounded wonderful, so I took that idea, and brought it home to my grill. Again, you really have to go, "O.K. Summer: fresh, bright, crisp and clean flavors." The peaches got quartered, drizzled with a little oil, and grilled for just a few minutes. The salmon I grilled as well, and made a really nice barbecue sauce with a little added chipotle pepper, peaches, and the brandy. I always strive to have a good balance of flavors, and the heat of the chipotle barbecue sauce worked really well with the fresh, sweet peaches.
Vegetables too. Zucchini and yellow squash may sound redundant and like something straight out of the eightie's, but damn if it's not tasty grilled and drizzled with some extra virgin olive oil!
We've been doing sautee'd julienned squash and zucchini at South Beach Grill for years, and still get compliments from our guests on how good our vegetables are, and asked what we do to them. Well my friends, it's not hard, we use fresh veggies, and saute them to order just till there cooked through, and finish them with olive oil. That's it! No butter, no excess seasoning, just a nice quick saute in a really hot pan.
As tempting as it is, especially for us guys, not everything needs to be grilled. Roasting in the oven is a great way to bring out the flavor of vegetables and some fruits as well. At the restaurant, we serve an Iceburg wedge salad with oven roasted Roma tomatoes. The salad is served with a peppery feta dressing, and roasting the tomatoes brings out their sweetness which is a nice balance (there's that word "balance" again) and contrast to the dressing.
Summer is here. And with it comes a bounty of wonderful produce. So wheather you're grilling some fresh picked rhubarb, or roasting tomatoes, remember to keep things simple, and let the freshness of the product your using be your guide.
Grilled Salmon and Peaches With Chipotle Peach Barbecue Sauce
4 each salmon filets
2 each fresh peaches
2 tbs. extra virgin olive oil
1/2 yellow onion, diced small
1-15.25 oz can peach halves in syrup
3 each chipotle peppers (packed in adobo sauce)
2 tbs. sugar
1/4 cup apple cider vinegar
1/4 cup brandy
2 tbs. molasses
Pre-heat a gas or charcoal grill.
Slice fresh peaches in half, and remove the pit. Cut into quarters. Brush the salmon filets with 1 1/2 tablespoons of the olive oil, and season lightly with Kosher salt and ground black pepper.
While grill is heating, make the sauce. In a medium saucepan, saute the onions in 1/2 tablespoon of olive oil. When onions have softened, add sugar, brandy, vinegar, and molasses. Bring sauce to a simmer for about 10 minutes. Remove from heat, transfer sauce to a blender, and add the canned peaches and chipotle peppers. Blend until smooth.
Brush grill with vegetable oil, and grill salmon to desired doneness, basting with the barbecue sauce just before removing. Grill peach quarters for about two minutes per side.
Plate the salmon, top with the peaches, and serve remaining barbecue sauce on the side.
Subscribe to:
Posts (Atom)